Raspberry PI BLE 服务搭建与BtleJuice的使用 2020-05-08 03:22:03 Steven Xeldax > IOT搞了这么久,也测试了很多包含很多脆弱性的BLE设备,但唯独自己没有写过BLE,看在买来的树莓派吃了两年的灰,所以这次打算折腾一下。 ### 实验目标 BLE控制GPIO信号 涉及到GPIO以及BLE Server的知识 编称语言Python ### GPIO IO的引脚是嵌入式设备的灵魂之一,我们通过这些IO引脚能够连接各种电子设备,电路模块和传感器,树莓派一共有40Pin的IO接口,接口的布局图如下所示: 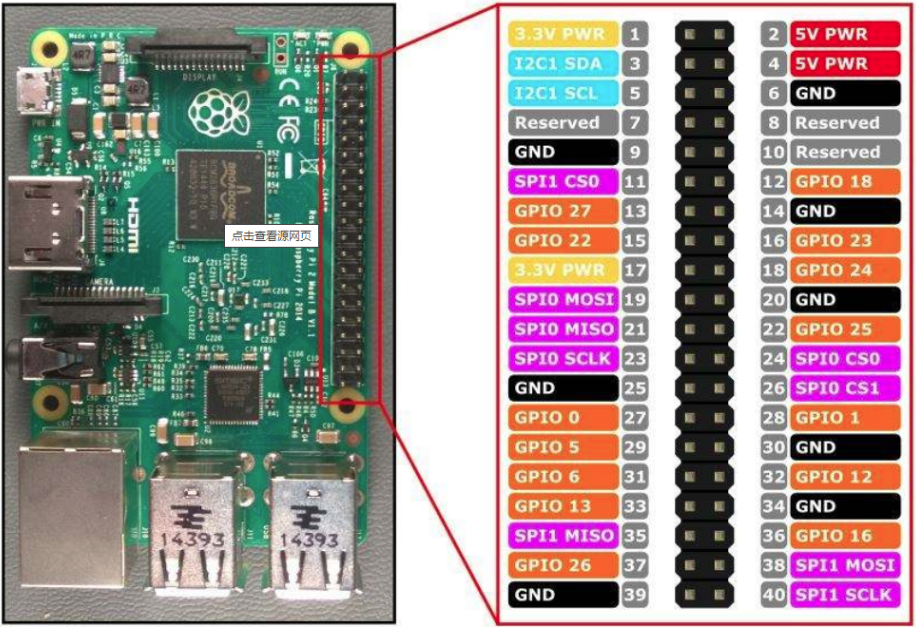 树莓派系统本身集成的RPi.GPIO,我们利用Python可以实现最简单的IO控制 ``` import RPi.GPIO as GPIO import time # BOARD编号方式,基于插座引脚编号 GPIO.setmode(GPIO.BOARD) GPIO.setmode(GPIO.BCM) # 输出模式 GPIO.setup(11, GPIO.OUT) while True: GPIO.output(11, GPIO.HIGH) time.sleep(1) GPIO.output(11, GPIO.LOW) time.sleep(1) ``` 注意编码模式,如果我们要使用上如GPIO的编号的话我们就采用BOARD模式,如果是第几个引脚更加底层的需要使用BCM的编号方式。 ### BLE BLE Client的编写其实很容易,最简单的Gattool或者bluepy包都是可以解决问题的,但是要使用Gatt Server就不是那么的方便。 这边选用Jumperr-labs/python-gatt-server的项目。 git clone https://github.com/Jumperr-labs/python-gatt-server 1.安装BlueZ 需要注意,一定要安装项目指定的版本,不然stack的接口变化都会导致出错。 sudo apt-get update sudo apt-get install libudev-dev libical-dev libreadline-dev libglib2.0-dev libdbus-1-dev wget http://www.kernel.org/pub/linux/bluetooth/bluez-5.45.tar.xz tar xvf bluez-5.45.tar.xz cd bluez-5.45/ ./configure make sudo make install 2.修改bluetooth配置 sudo nano /lib/systemd/system/bluetooth.service Add --experimental to ExecStart. The line should look like this: ExecStart=/usr/local/libexec/bluetooth/bluetoothd --experimental Reload the service: systemctl daemon-reload sudo service bluetooth restart 3.然后pip安装依赖运行 python gatt_server_example.py 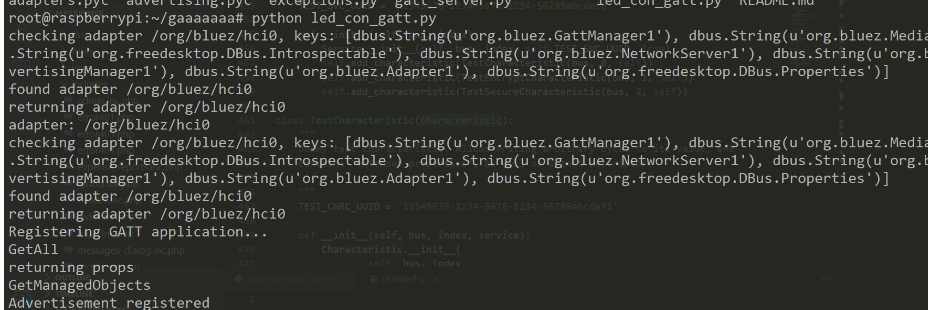 **代码说明** 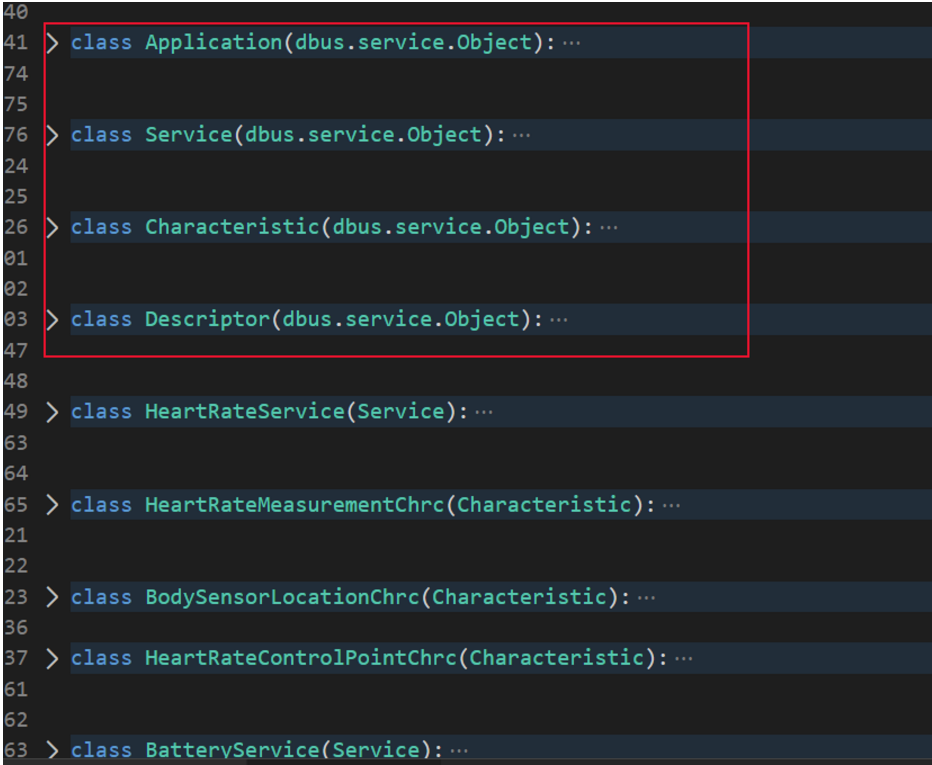 Application,Service,Characteristic,Descriptor这些都是bluez对应的接口我们不需要对这些底层的代码进行修改,我们只要关注Service服务以及服务下的Characteristic特征就行。 Service ``` class TestService(Service): """ Dummy test service that provides characteristics and descriptors that exercise various API functionality. """ TEST_SVC_UUID = '12345678-1234-5678-1234-56789abcdef0' def __init__(self, bus, index): Service.__init__(self, bus, index, self.TEST_SVC_UUID, True) self.add_characteristic(TestCharacteristic(bus, 0, self)) self.add_characteristic(TestEncryptCharacteristic(bus, 1, self)) self.add_characteristic(TestSecureCharacteristic(bus, 2, self)) ``` Characteristic ``` class TestCharacteristic(Characteristic): """ Dummy test characteristic. Allows writing arbitrary bytes to its value, and contains "extended properties", as well as a test descriptor. """ TEST_CHRC_UUID = '12345678-1234-5678-1234-56789abcdef1' def __init__(self, bus, index, service): Characteristic.__init__( self, bus, index, self.TEST_CHRC_UUID, ['read', 'write', 'writable-auxiliaries'], service) self.value = [] self.add_descriptor(TestDescriptor(bus, 0, self)) self.add_descriptor( CharacteristicUserDescriptionDescriptor(bus, 1, self)) def ReadValue(self, options): print('TestCharacteristic Read: ' + repr(self.value)) return self.value def WriteValue(self, value, options): print('TestCharacteristic Write: ' + repr(value)) self.value = value ``` ### BTLEJuice 安装 1. Btlejuice需要一个相当新版本的node(>=4.3.2) 和npm。你可以按照本指南使用nvm(Node 版本管理器)来进行安装 2. 安装依赖 sudo apt-get install bluetooth bluez pbbluetooth-dev pbudev-dev 2. 安装bltejuice npm install -g btlejuice 运行 hciconfig查看MAC地址 启动btlejuice-proxy sudo btlejuice -u <Proxy IP address> -w 连接proxy Go 参考资料 https://blog.csdn.net/chentuo2000/article/details/81051645 https://shumeipai.nxez.com/2017/06/01/raspberry-pi-gpio-control-rgb-color-led-lights.html https://github.com/Jumperr-labs/python-gatt-server https://github.com/DigitalSecurity/btlejuice https://www.sohu.com/a/249356864_354899